• Skip to primary navigation
  • Skip to main content
  • Skip to primary sidebar
  • Skip to footer

Wood Fired Fanatics

  • About
  • Recipes & Techniques
  • Wood Fired Oven
  • Technical Aspects
  • Pizza

Uncategorized

Live Cooking Class

July 17, 2020 by Angela

There were many weeks of social distancing and shelter in place…so what did Forno Piombo (the most awesome wood fired oven company) do?? Host a live stream wood fired cooking class. Genius. We were all stuck at home trying to figure out what to cook and how to make it fun. Well, they did it. I sat watching a live stream cooking class and can’t wait to make this chicken with the one currently hanging out in my freezer.

This class was taught in real time. Most states were staying at home to stay safe, so….many can cook along with the chef. We spent the weekend with my in-laws before we were mandated to shelter in place so I did not cook with the chef. Here is the recap of the class:

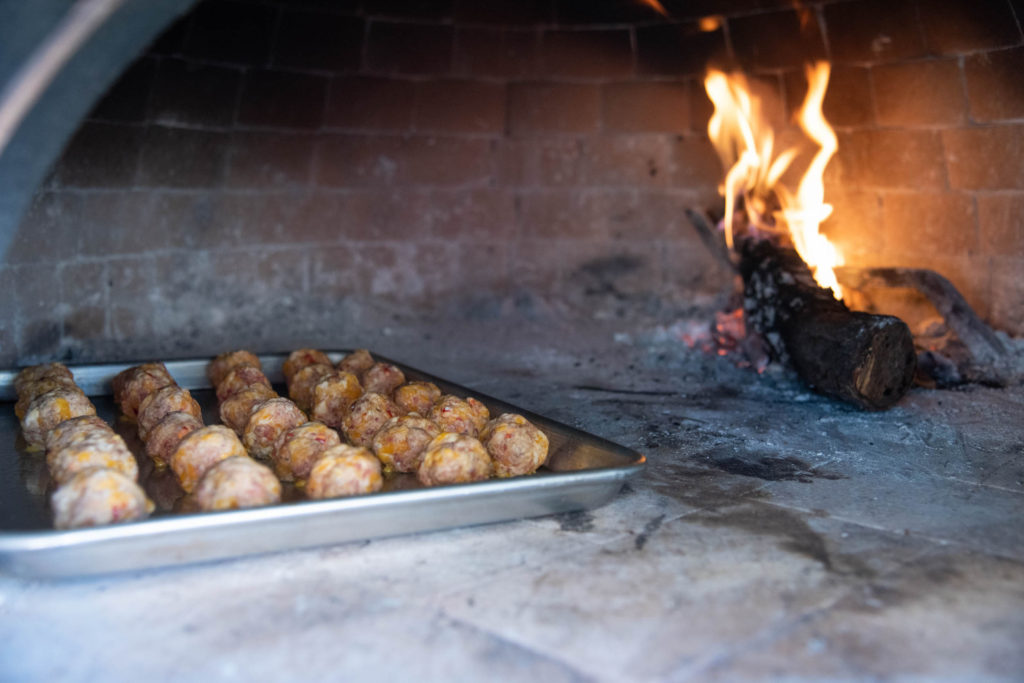
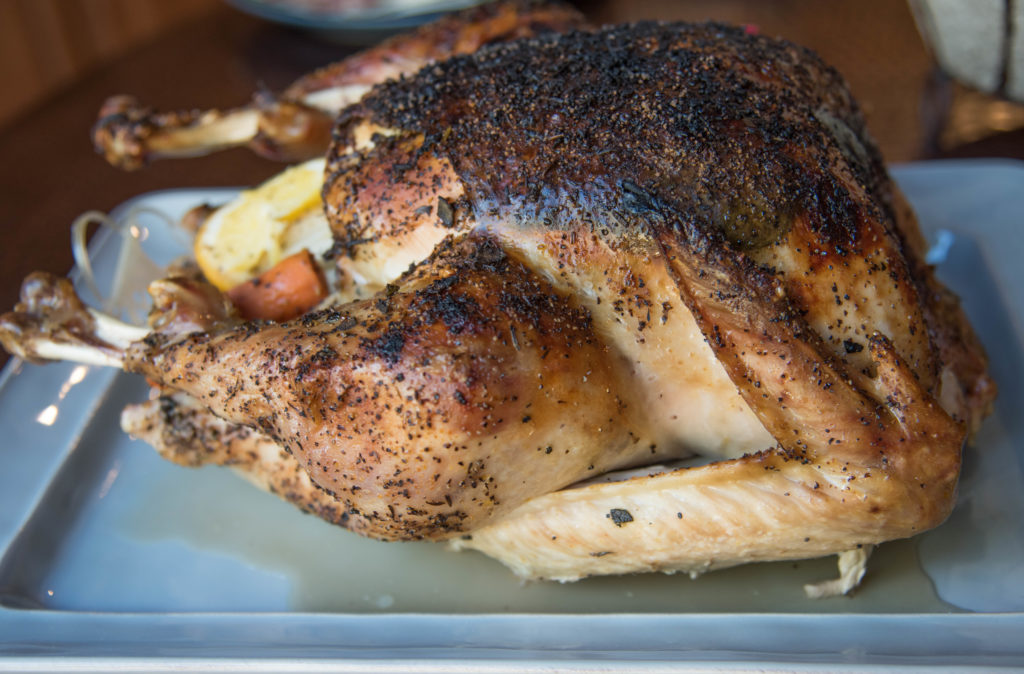
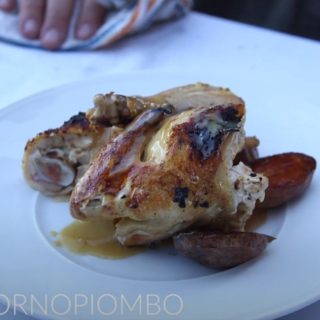
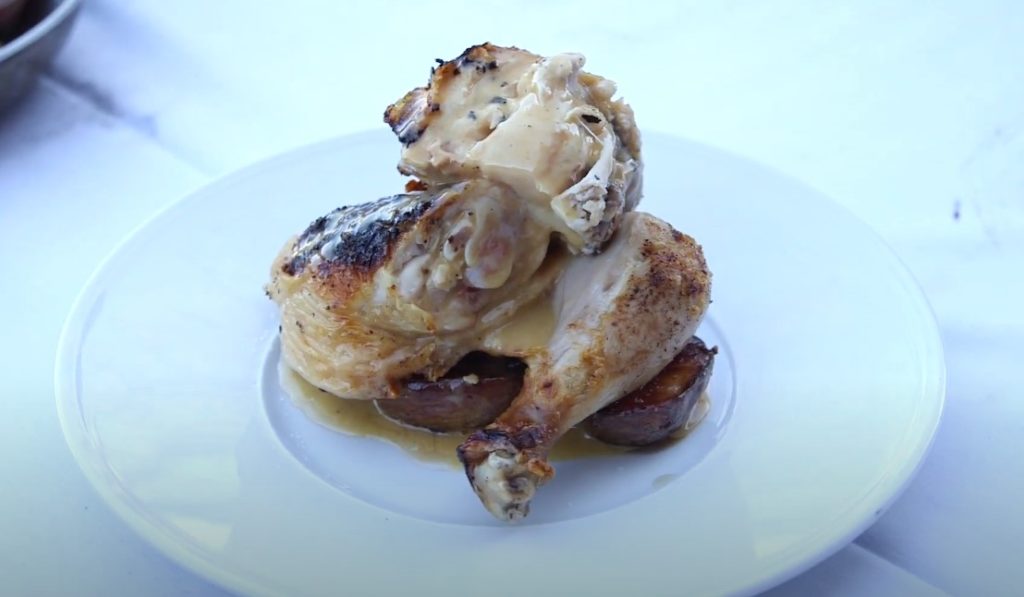
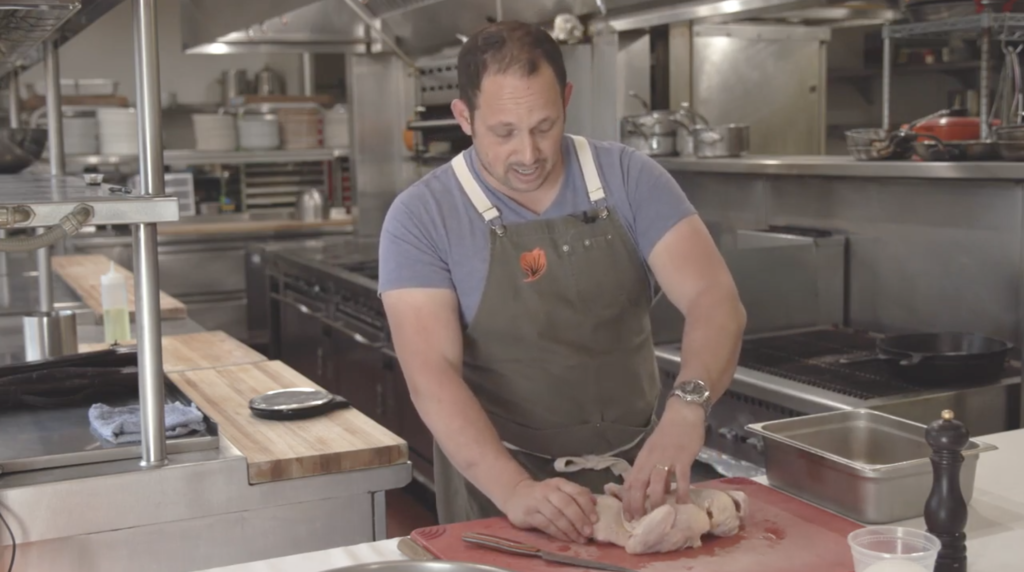
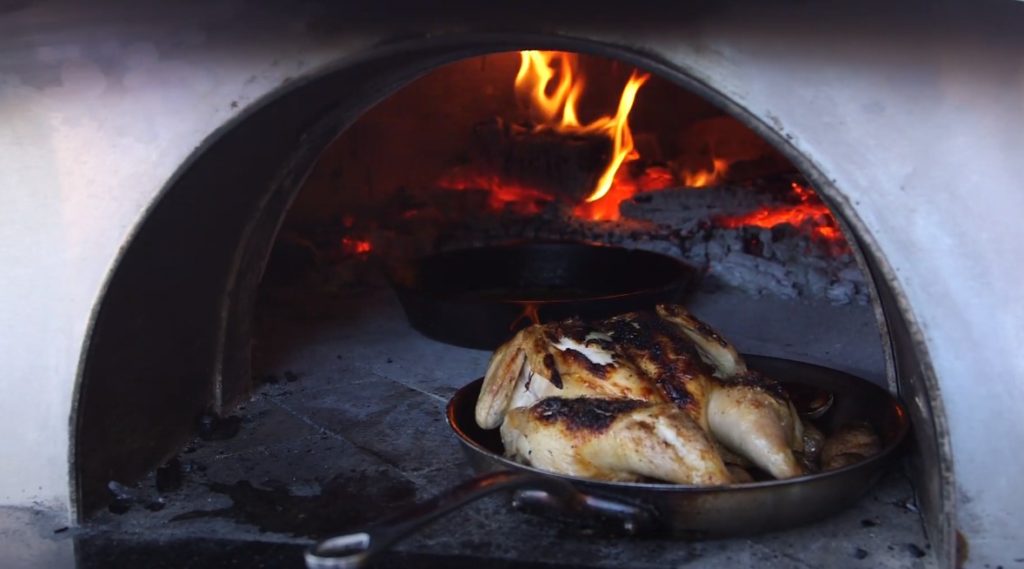
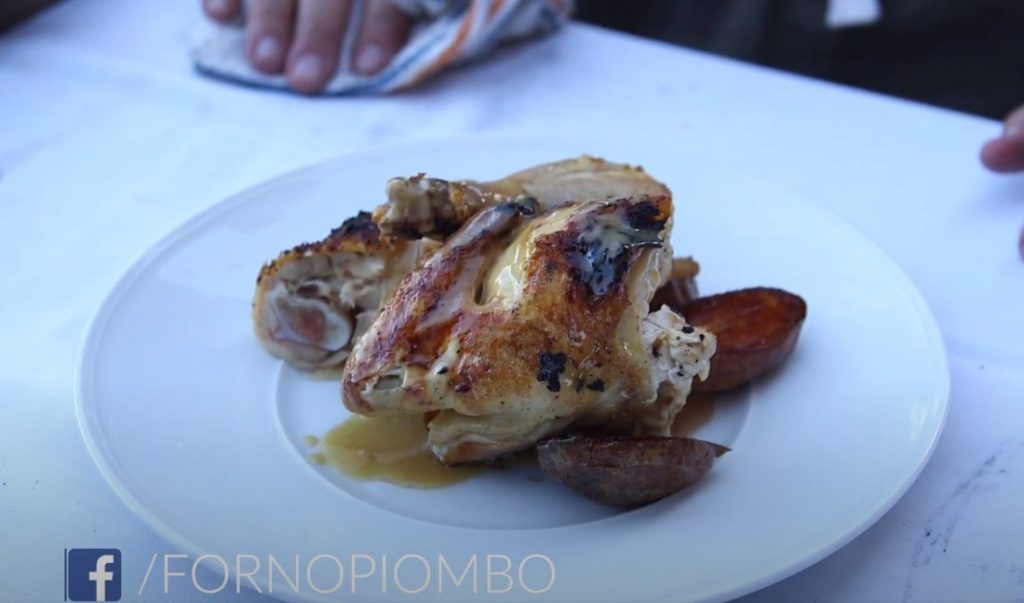
The menu is roasted chicken and Yukon potatoes. Chef Itamar Abramovitch demonstrates how to spatchcock the chicken in preparation for cooking by removing the backbone and wish bone and then cracking the breast bone. This is a skill I have never tried but seems to be quite popular as of late (or maybe I am just paying more attention).

I love that he gave a very basic process that could be adjusted to any taste or to incorporate any flavor profile. For example, he placed the potatoes in a pan with ample canola oil. Simple. However, he shared that you could easily add garlic, rosemary, Calabrian chili, etc. to add flavor to the potatoes

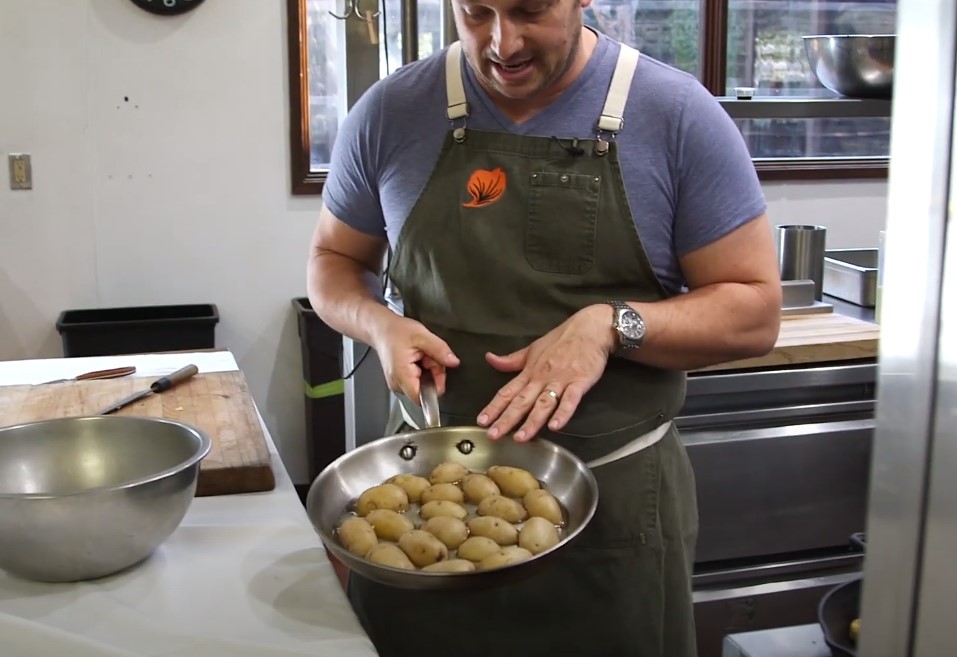
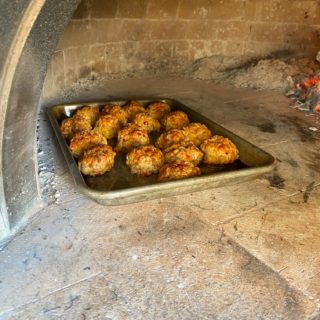
Speaking of the potatoes, it is important to note that he boiled the potatoes whole. Once they were knife tender, he drained them and when cool enough to touch, sliced them in half lengthwise. They were then placed cut side down in the stainless steel pan for roasting in the oven.

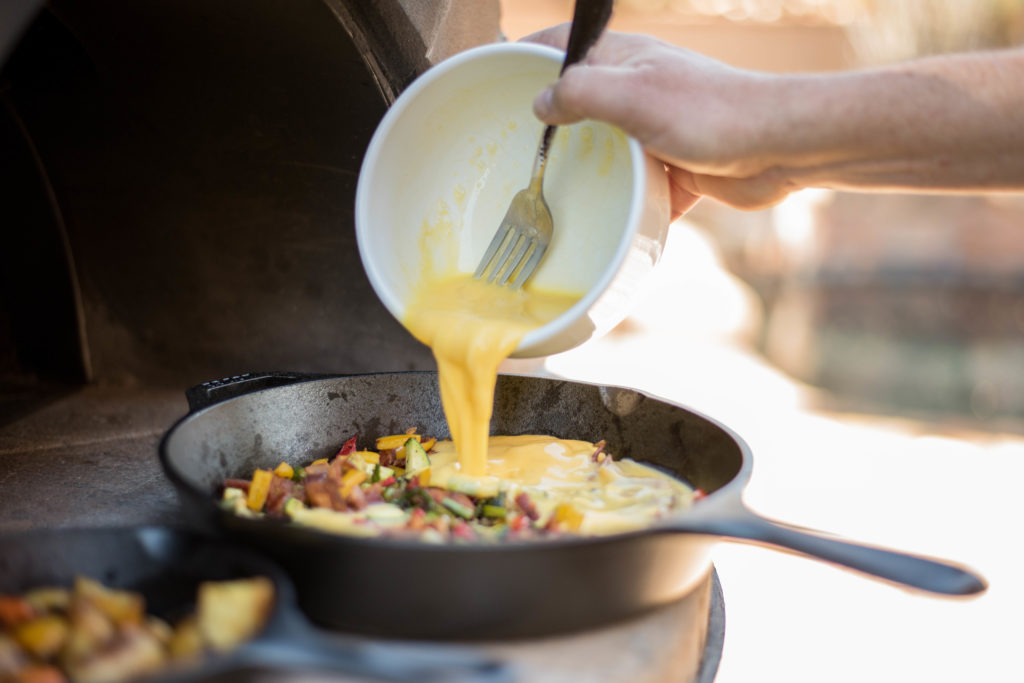
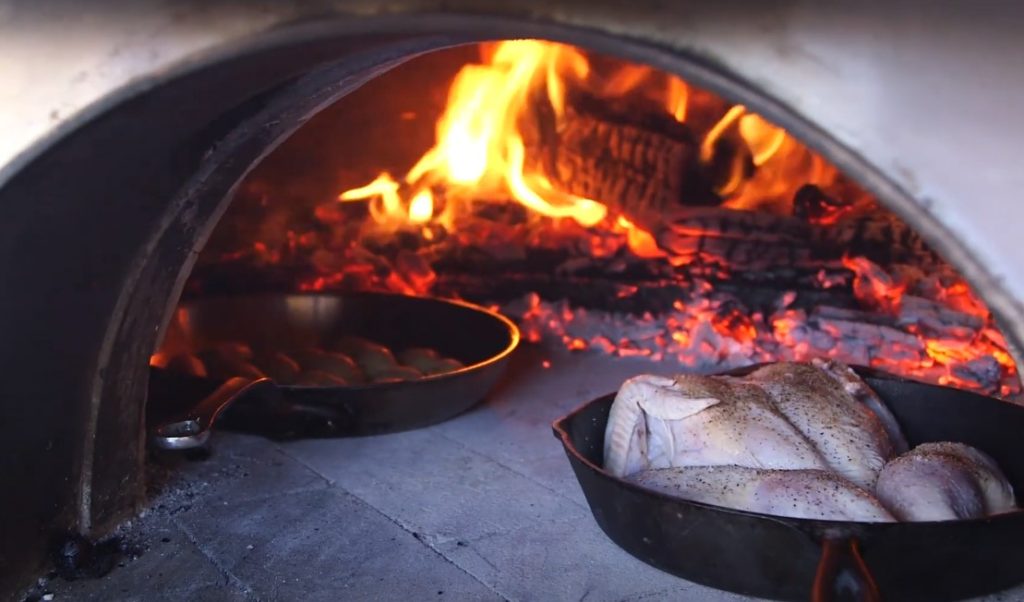
It is noted from a viewer that Chef is using two different types of pans. Stainless for potatoes, cast iron for the chicken. Why? Metal is a great conductor to transfer heat from a source to food. Cast iron is heavy and retains heat within itself. When cold food is placed in cast iron, the pan stays hot. Stainless pan TIP: If you are using a traditional home oven, preheat the pan in the oven before placing food in it. In a wood fired oven the pan sits directly on the hot bricks so heat will transfer quickly and preheating is not necessary. This explained his choice not to preheat the pan in today’s demonstration.

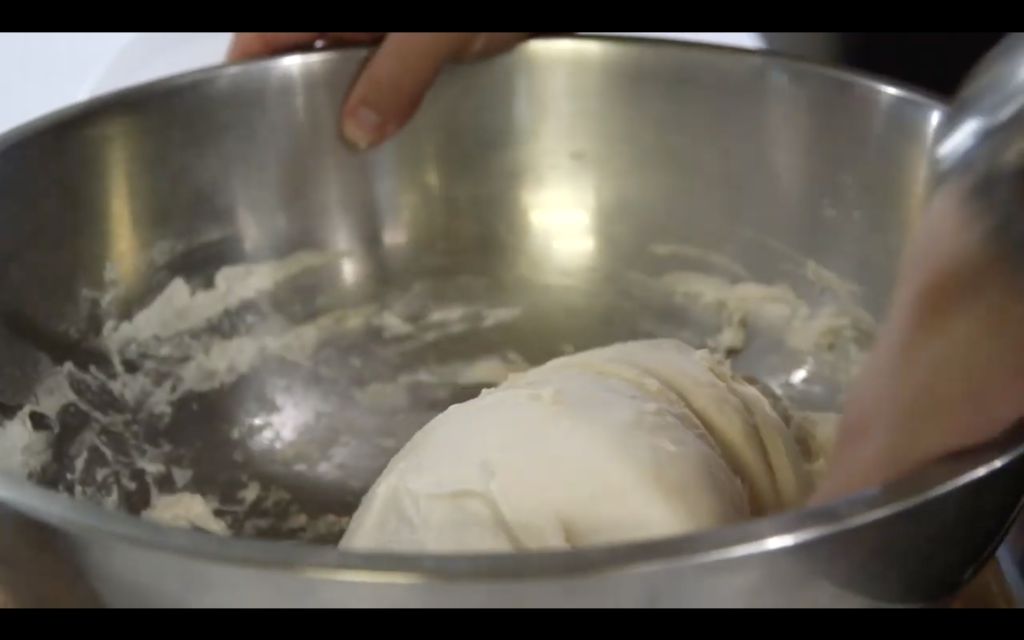
Chef Abramovitch mentioned he currently loves to make bread. I am very interested in bread baking, particularly sourdough bread as we just returned from San Francisco. Although I missed all of the details, he gave instructions for a bread starter that I need to go back and listen to more closely.

Often times in wood fired cooking, the fire is placed in a particular area of the oven to provide a specific level of heat and necessary cooking space. In the case of the chicken and potatoes today, the fire was in the back of the oven in order to allow more surface area in the front. This is a great way to control the environment your dish is cooking in…closer to the fire=higher heat, closer to the mouth of the oven=cooler temperature.

The chicken was prepared very simply with just salt and pepper for today’s class. Variation suggestions were jalapeño under the skin of the chicken or adding lime or lemon zest peeled with peeler under the skin and whole slices under the chicken. The same advice could be use to add herbs.

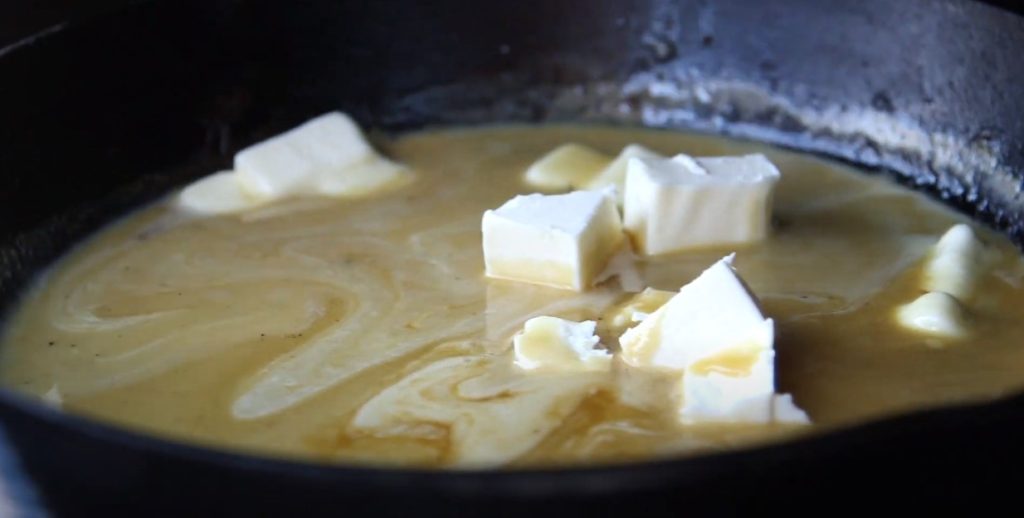
One of my favorite moments was when a playful chef viewing the class online like us novice cooks chimed in and asked about a sauce. Chef Abramovitch was able to think on his feet, take us on a field trip to his fridge and pantry and whip up a delicious sounding sauce! He made a play on a classic beurre blanc using fat, milk solids and “water”. There were no lemons on hand, so using what he had, the new sauce stars were champagne vinegar and tangerine juice (they were the “water”). He started the sauce in a new pan but eventually changed course and used the pan the chicken had been cooking in so he could utilize the fond. You know, the delicious browned bits on the bottom of the pan? He used the vinegar and juice to deglaze the pan and put it in the oven to begin reducing. When there are only a few tablespoons of liquid remaining, add butter…heavenly delicious butter. Shaking the pan as the butter is added will emulsify the butter into the liquids (you could also whisk). Pro Tip: If the sauce starts to separate, remove from heat (possibly even to a different dish/pan) and add another knob of butter to quickly cool it down.

This meal looked delicious and was a great starting point for many variations depending on your particular tastes and preferences. I loved this statement, “Wood fired cooking forces your attention.” I think this is some of the allure of wood fired cooking. It is an active process. There are some dishes you can braise in the oven and walk away but for the most part you have to tend to the fire. Move your dish closer and farther from the heat source to control cooking. Although you don’t want to do this right now in Phoenix, there is also the pure joy of cooking outdoors. Enjoying the weather while making something for those you love.

If you would like to watch the class for yourself just Click Here to be directed to Forno Piombo’s YouTube page. If you want to hear about new posts to our blog when they happen, please like us on Facebook and follow us on Instagram @woodfiredfanatics.

Filed Under: Uncategorized

Learning to Make Mozzarella

May 13, 2020 by Angela

I have attempted the cheese making process a couple of times, neither with great success. First attempt, the cheese had great texture and absolutely ZERO flavor. So, I decided not to give up and try again. This time I got great flavor but it was kind of rubbery and didn’t really melt on the pizza. I gave up and realized I needed professional help.

Thanks to Facebook, I discovered Making the Cheese! I was excited to have a cheese making class right here in town. I couldn’t wait to figure out how to make my own delicious cheese for pizza night!

The tools for cheese making

Upon arrival I was already impressed, Kathy and her husband were so organized with everything set up and ready to go. Most of the tools I already owned and the small groups made it fun to learn and nice to be hands on during the process to not only see what was happen but feel the textures and technique. We learned what products to use and the steps to take, to create “quick” and delicious mozzarella cheese.

Did you know a stainless steel pan with a thick bottom is the best choice to make cheese to avoid burning the milk? Did you know that rennet tablets will keep for a long time in the freezer? The ingredients are a bit unusual until you know what you are looking for. The process is easy when you get used to it. Stirring, temperature monitoring, cutting and finally stretching. I can’t wait to share my first independent cheese making attempt with you.

At the end of class cheese making kits were available. The kit contains all the ingredients necessary to make your first batch of cheese, just add milk! A few of the tools are included as well like the heat resistant gloves and cheese cloth. I was also able to purchase the two perforated spoons.

If you live in Phoenix and want to take your pizza nights and entertaining to the next level or just love to support small local business, check out Making the Cheese. I look forward to learning more about cheese through another class in the future.

Although we took this class in February, it took me a month to build up the courage and find the time to try to make cheese at home. I have to be honest (not humble) it was GREAT! I want to work a bit on making the cheese more moist (awful word I know but it is the one I needed, ha!) but the flavor was incredible. Perfectly salty and rich. Made a great pizza!

If you love pizza and want to know more about wood fired cooking, please follow us on Instagram and Facebook @woodfiredfanatics

Filed Under: Uncategorized

Easter Brunch Idea: Jim’s Hot Sausage Balls

April 8, 2020 by Angela

Well, this is an Easter like we have never experienced in our lifetime. We are socially distancing from our extended family and friends and will be celebrating just as our little family unit. However, I still want to recognize the holiday and celebrate it as special, not just another “What Day Is It” kind of day. I hope you feel the same and are considering brunch ideas for your social circle. If you need an idea, I have one for you! Jim’s Hot Sausage Balls

Do you have an event in your life where you do things that you maybe would not the rest of the year? We do! Drag Race Weekend. We spend 3 days hosting friends, family, and colleagues to amazing food, many beverages and great fun all trackside for a national drag race event. This is a weekend where we cook outside for all of our meals and eat things we typically would not eat. Jim has a trackside RV spot a few spaces from ours. We see him once a year. Without fail he makes sausage balls and shares them with us. I really know nothing about Jim, we have never been to his house and have no idea what his hygiene habits might be, but I cannot resist partaking in his balls. (Ha! Pun intended) Gosh, I am glad I broke the “don’t take treats from strangers” rule! His hot sausage balls are super tasty!

Luckily the 2020 event in Phoenix was prior to the COVID-19 outbreak so I got to chat with Jim about his sausage balls again this year to figure out to make them myself. Luckily, it is a Betty Crocker recipe that is modified slightly. Super easy and a total crowd pleaser. When we cooked these to photograph for the blog we had a ton! We could have frozen the extras, but why not share them with friends. Well, it was unanimous…everyone loved them! It even took one friend back to her younger years when her mom would make something similar for Christmas.

So…here is how you can make your own Hot Sausage Balls. We typically use residual heat when we are making meals other than pizza. Residual heat just means we make pizza a day or two before and then use remaining coals and additional logs to achieve the necessary baking or roasting temperature. For this recipe you want your oven between 400 and 450 degrees. Note: There is a picture toward the end of this post that shows our coals and one lone log with a small flame to achieve this temperature.

Choose your breakfast sausage. We prefer things spicy so I chose Jimmy Dean HOT sausage. You could also go with regular or even sage and they would still be great. Just in case the hot sausage wasn’t enough, Jim adds peppers. He used jalapeño, but I had fresno chili on hand so I used that.

Next, THE best pantry ingredient…Bisquick! I am not exactly sure what is in Bisquick, but it can be savory or it can be sweet (like our wood fired Apple Crisp), it is just magical.

SQUIRREL! Do you have a food processor? It is seriously the best invention and one that I had never fully utilized until the last few years. Just as I embraced its magic…it broke. Holy smokes the new one is awesome!!! It is now my best friend when grating large amounts of anything, chopping, etc. I dread hand grating cheese and the 16 ounces of cheese for these balls is NO fun to grate by hand. I should also say, I prefer not to use the pre-shredded stuff because of the anti-caking agents that cause it to melt differently than freshly grated. I tossed it in the food processor and in literally 5 seconds I had all this cheese! Ok, back to the real reason we are here.

Add that gloriously grated cheddar cheese and the milk to act as the binder. Combine everything and roll like meatballs.

In this time of COVID-19, I did use gloves.

Place the sausage balls on a lightly greased baking sheet and slide them into the wood fired oven. You are looking for them to brown and cook all the way through. No need to roll or turn them over just bake to delicious perfection. Depending on the temperature in your oven this should take about 15 minutes, give or take.

For variation, you could add herbs or different cheeses, but in my mind these are perfect as is. They take me right back to the trackside RV and my once a year friend, Jim. So if you are looking for something easy, SOOO tasty and a total crowd pleaser, make and share Jim’s Sausage Balls for your Easter brunch this year.

For more wood fired cooking fun please follow us on Instagram @woodfiredfanatics and like us on Facebook!

Print Recipe

Jim’s Hot Sausage Balls

Prep Time15 mins
Cook Time12 mins
Course: Breakfast
Cuisine: American
Keyword: bisquick, breakfast, brunch, sausage
Servings: 10 servings

Ingredients

  • 1 lb Jimmy Dean Hot Sausage
  • 3 cup Bisquick
  • 16 oz sharp cheddar grated
  • 1/2 cup milk
  • 2 fresno chiles finely chopped

Instructions

  • Using residual heat in the wood fired oven, heat oven to 400-425 degrees.
    Combine all ingredients in a large bowl. Shape into approximately 1-inch balls.
    Place on lightly greased baking sheet. Cook 10-15 minutes or until the balls are browned and cooked through.

Filed Under: Uncategorized

Experience Has Changed The Wood We Love

April 1, 2020 by Angela

Small rounds and double split logs

When I originally wrote this post, I knew that wood was very important piece in the wood fired cooking puzzle.  However, I didn’t realize how much the type of wood could affect the fire created.  We have been unable to find the pecan we had used almost exclusively since day 1. An employee at the wood lot suggested white oak as a good alternative.  Well, it wasn’t…at least for us.  It seemed to have a shorter burning duration, the wood chunked off when splitting, and didn’t seem as heavy requiring more wood to achieve the same temperatures we had reached with pecan.

We had finally made it to the end of our batch of white oak, so Mr. Fanatic went on the hunt for pecan.  The first lot was bare.  Next, he stopped at the Paul Bunyan Firewood lot.  He quickly learned it is under new management and they ROCK!  Unfortunately, they too were out of pecan. Apparently it is very scarce in our area at the moment. The friendly helpful husband and wife team recommended olive wood which is abundant.  Based on our previous experience with recommendations, Mr. Fanatic bought a small amount to try, just in case it was not awesome. It is fantastic!!  The kind staff at the lot split the wood to his liking and it is working as well as our previously loved pecan.

We have also discovered that we like our wood to be smaller in diameter than we had previously thought.  We are able to stretch the wood for a a longer period of time with the smaller pieces.  Another great tip is that small round “logs” that have not been split will burn for a long period of time.  We use those when we want steady heat and temperature rather not to reach the initial high temperature.

You may recall in the original post about wood we mentioned that the wood you use can alter your overall cooking experience greatly.  We have certainly found that to be true.  If your wood is wet, too large, or too soft your experience may not be what you were hoping for.  So, what should you choose to improve the outcome of your meal or meals?

Start with a hard wood.  Woods like fruit and nut are great choices.  They are dense and will burn very hot for a longer period of time.  The wood should also be mild in flavor. It is important to plan what types of food will be made.  For many wood fired dishes, pizza for example, significant wood flavor is not desired. Some good options are apple and Australian red gum but neither will burn as hot or as long as pecan or white oak.

Different woods will be available based on geographic location. Find the best wood for a good price in your area and use that. A simple Google search will help turn up your best options. Red gum is very popular because it grows well in Australia. It was brought to the United States to be used for railroad ties. Its dense, strong nature makes it ideal for this application. Only the trunks can be used for railroad ties, so the branches are turned into firewood.

Wood to be used for wood fired brick oven cooking should be cut and dried for at least one year before use. If the wood is too moist, it will be difficult to light. Once lit, that wet wood will create a very smokey fire. This is not only annoying for those near the oven, but this smoke will turn to creosote and coat the inside of the chimney/exhaust system. When the wood is wet, the oven has to work to evaporate the moisture rather than heat the oven. This means it will take the oven longer to reach cooking temperatures and be less efficient.

Wood size is also important.  Double split logs that are about the length of your forearm are ideal.  The fringy bits on these logs will catch fire quickly and get the fire started faster.  Although larger logs take longer to light and are better used once the fire has been established, they will burn longer than their smaller counterparts. Beware, round pieces tend to want to roll so they are better used if you have a grate to keep them in place.

Now you know the basics. Start by doing a google search for wood indigenous to your region.  Once you have learned what types of wood are locally sourced in your area, make friends with those at your local wood lot.  Hopefully, with these tips you will LOVE wood, too!

For more tips and information please follow us on Facebook and Instagram @woodfiredfanatics.

Filed Under: Technical Aspects, Uncategorized, Wood Fired Oven

Wood Fired Fanatics in the Time of COVID-19

March 18, 2020 by Angela

Well, this is a post I never dreamed I would write. With the constant uncertainty and threat of national quarantine, I am wondering about the future…of our country, of our state, of our city, and of my family. Many have compared this shock and surreal experience to the feelings they felt during 9/11/2001. I feel very differently…9/11 brought our country together. This is separating us…physically. At least in 2001 we were able to gather our families to watch the news with fear but share love and hope for the future. We saw first responders charging toward the threat to save the victims. The 2020 COVID-19 world means the cancellation of a family BBQ because many of those meant to attend were over 65 years of age and someone had a cough. It meant those same family members that had come to town to surround themselves with family, left town before a BBQ could be held in fear that they may not get home unless they leave at once. It is bringing working from home situations and quiet streets. Kids are home from school and going stir crazy.

I am almost always a glass is half full person. I see the bright side of things and believe that the best will somehow shine through. I have held that attitude as the pandemic has come to be. Today, was the day that I crashed. This is serious. This isn’t ending. This is scary and uncertain and change is on the horizon. I will admit I let myself have a pity party this morning. I worried. I expressed my fear to friends and family. I let myself wallow in it. Then I realized…it wasn’t helping and it didn’t feel good.

So after fear of contracting this virus, which let’s face it is really out of our control, the biggest concerns are food and toilet paper. Although I love toilet paper…stores have it or they don’t. But food…it is my passion. I love it. I love planning meals, cooking them and sharing them with others. Given that stores are very picked over and food is scarce in many departments, I started to think creatively. The scarcity, the possibilities, and how to best feed our families. This is a time like many of us have never known. We are learning to work with what is available and many of us have extra time to devote to cooking, given that sports are cancelled and we are working from home. So this has me dreaming up ways to use the wood fired oven. For some reason cooking with fire and wood seems more fun than cooking indoors. It offers an opportunity to get outside of the four walls of home. Cooking in general takes the focus off the chaos and gives distraction.

So as you are spending time with your immediate families, the people and animals that reside within your residence, think about getting creative. How can you use the meat, canned goods or veggies that you have on hand? Light the fire in that wood fired oven, or maybe it is your big green egg, smoker or BBQ grill. Know that there are others out here trying to get creative and work with what they have while finding fun and normalcy in the chaos. Despite the recommendations to socially distance ourselves, you are not alone. We are all in this together.

Filed Under: Uncategorized

UPDATE! The BEST Pizza Dough Recipe

March 5, 2020 by Angela


This recipe is truly the best and gets rave review from our guests.  We have tweaked it a little since the original post. Look for the highlighted areas to note the small adjustments, that believe it or not have made a difference in our dough.

Have you ever heard the phrase , “sometimes you can’t beat a man at his own game?” Well, it seems in this case we couldn’t beat a woman at her own game. After the ups and downs of the many recipes we have tried, I think we have landed on a keeper (at least for now). We are in love with a slight variation on Mugnaini Pizza Dough, Large Batch recipe. This dough has knocked everyone’s socks off!  I should start by saying that Mr. Fanatic cuts the recipe in half so as not to have so many dough balls.

…

Read More »

Filed Under: Pizza, Recipes, Uncategorized

New Pizza-“The Bailey”

February 26, 2020 by Angela

Inviting friends to share in your pizza obsession is a great way to try new things. Ask someone what they would like on a pizza and you never know what they might come up with. Let me take you back to earlier in the day…

What’s the first question a guest asks when you invite them for dinner? “What can I bring?” My standard response is…”Just yourselves.” Last Saturday I was running behind when my sweet friend posed this question. So I said, “An appetizer, a light snack before pizza would be great.” Man, am I glad that I did because a new pizza was born from this simple request.

…

Read More »

Filed Under: Pizza, Recipes, Uncategorized

Forgive Me

February 18, 2020 by Angela

I am back.  I left you hanging.  High and dry…no pizza fun, no woodfired cooking, no explanation.  I just disappeared.  My deepest apologies.  I swore it wouldn’t happen but life got in the way.  In the full pizza of my life, the blog piece disappeared.  I hope I can win back your interest and get you intrigued by our pizza and woodfired cooking again! 

…

Read More »

Filed Under: Uncategorized

How Did You Celebrate National Pizza Day?

February 10, 2020 by Angela

What a perfect day to come back and reach out to my fellow Woodfired Fanatics…National Pizza Day!  I love that there is a day to celebrate the MOST delicious woodfired food…pizza.  I have to admit I didn’t even realize it was National Pizza Day when our plans pushed our regular pizza night from Friday to Sunday, but it worked out perfectly! I am sorry I have been a ghost for so long and have left you wondering where we went.  That will all be explained soon in another post. 

…

Read More »

Filed Under: Uncategorized

Grow a Pizza Garden

July 19, 2018 by Angela

Spring has sprung, temperatures are heating up and I have gardening on the brain. I have been dreaming of a garden for years. However, in my mind there were a ton of obstacles that would prevent us from being successful…dogs, pests, pest control, living on a mountain made of rock, heat…  Once we started cooking in the wood fired oven, the need for a garden became very apparent, we were going through ingredients so quickly that it was getting expensive.  With a little effort we found solutions to all of my obstacles and have a fun, simple garden that we use every week.  We are looking to expand and have more variety but for now the essentials are in place.

Most of my obstacles were solved by having a raised bed garden rather than a garden in the ground.  Our home is built on the lower slope of a mountain in here in Phoenix, solid rock.  There was no way we could plant directly in the ground.  Not only is the ground hard, we have a dog which means she might dig up, go to the bathroom on, or eat our delicious treats.  Scorpions are a fact of life in our in the desert preserve area where we live, this means we use a pest control company to reduce them and their food sources.  For these reasons we felt our garden needed to be not only above the ground so we could fill with soil but actually off the ground to keep the dog and poison out! We looked at several different options but settled on troughs from the local feed store.  They provide the protection we need and look cool with their galvanized exteriors.

So what did we plant in these super cool troughs?  Our weekly staples are growing like weeds and happy as clams.  There are some other plants that we have lost to  lack of experience or pesky insects.

Rosemary

At least here in Phoenix, rosemary grows like a weed.  In many places it is planted as part of the landscape design.  However for us, we have one in a pot and the other in a trough because it have become one of our favorite toppings on olive oil pizzas.  I just have to share our most requested pizza:  Top your dough with olive oil(no tomato sauce here), mozzarella and parmesan and throw it in you pizza oven.  When you have about 30 seconds left to cook, slide it out and sprinkle chopped rosemary on top and put back in the oven until ready to serve.  It is so good.  Even die hard tomato sauce pizza fans will quietly eat this and then ask for more!

Basil

Of course you can’t have a pizza garden without basil…but did you know how many varieties there are?!?!  I had no idea.  We bought a basil plant at Trader Joe’s and quickly devoured it, so we planted two more.  The basil is fabulously delicious but when we had pizza at Pizzeria Bianco on Easter Sunday we discovered that they are using some other variety of basil that has little pointy tips on the leaves.  I found a plant at the farmers market and trimmed it as the gentleman told us.  It was starting to get established and sprouting a few leaves…and now the cutter bees (or something) have taken them back to the stem. So the jury is still out to determine if it will take off, or if I need to hit that farmer up for another plant.

Peppers

We love a spicy pizza and peppers are an essential part of spicy food.  We planted a Fresno, Serrano and Jalapeño peppers.  The plants did very well until there was a hiccup with our irrigation system and they lost their water source. The peppers were very hot and spicy.

This post will be a work in progress as more goodies are added to our garden…and survive!  I would love to know what you can’t live without in your pizza garden if you have one, or what you plant after this post inspires you to get out into your own garden.  If you love wood fired cooking and great food, please like us on Facebook and follow us on Instagram so you know when the latest content is available. Please help me add to my garden by commenting on what you grow in your “pizza garden” below.

Filed Under: Pizza, Uncategorized

  • Go to page 1
  • Go to page 2
  • Go to Next Page »

Primary Sidebar

Connect With Me!

  • Facebook
  • Instagram
  • Pinterest

Check This Out

Easter Brunch Idea: Jim’s Hot Sausage Balls

Experience Has Changed The Wood We Love

Wood Fired Fanatics in the Time of COVID-19

Recent Comments

  • Bob Barnes on Wood Fired Fanatics in the Time of COVID-19
  • Angela on UPDATE! The BEST Pizza Dough Recipe
  • Debi Sparks on UPDATE! The BEST Pizza Dough Recipe
  • Debbie on New Pizza-“The Bailey”
  • Larry Ludwig on Baby It’s Cold Outside Beef Stew

Footer

Connect

Angela Barnes wants to educate fellow wood fired fanatics on cooking and technical aspects of wood fired ovens. Read More…

  • Facebook
  • Instagram

Copyright © 2025 · Foodie Pro Theme by Shay Bocks · Built on the Genesis Framework · Powered by WordPress